Timr is a time tracking tool for the Command-line written in Ruby. It uses Curses to generate the UI. You can track your time spent for a specific project. I know. There are (too) many time tracking tools and such blabla you can use. The main focus of this tool is to use it on the Command-line. I love the Command-line, so I want the terminal to handle as much as possible. I don’t want programms with fancy UIs. Text-based is good enough. Today, after I introduced a colleague into PostMan he ask me what other tools I would recommend him to use. I said, Bash, I would recommend you to use Bash.
In the first place I thought that there will be more basic functionality provided by Curses. For example, to handle a list-view you need to take care for yourself. You are using Curses because you don’t need to do everything. The basic stuff is still needed to do by you, the programmer.
For this purpose I wrote something like a Model-View-Controller for the terminal using Curses. Something like. It’s more tailored for the use case of this project rather than an abstract Model-View-Controller class. But anyway, that would be a good idea for a separate project. Providing an abstract Model-View-Controller in Ruby for the terminal.
So what can you do with Timr? Every project gets its own directory. You need to take care about the path to the directory. When you first start Timr you need to specify a directory where all the data of your project should be stored. Timr creates the directory for this path. Using argument option -d with value ~/.timr/projects/PROJECT_NAME is a good idea. An alias for that is -p PROJECT_NAME.
After you start Timr you can add Tasks. Each Task can have one or more Tracks. A Track is a period with a start and an end date. A Track can also have a description. If a Task has sub-tasks or different parts to finish the description differs between the parts. A Track can have only one Task as parent. Only one Track of one Task can run at a time.
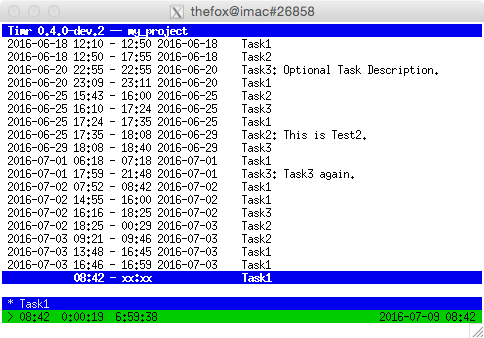
There are 3 Tabs. Accessible via key 1, 2 and h on your keyboard. The most important good-to-know Tab is the Help Tab, accessible via key h. Pressing key 1 on the keyboard shows a list of all Tracks. Like a Timeline of all Tracks of all Tasks. Key 2 shows all Tasks. To navigate through the list press arrow keys. Pressing key Return on an existing Task in Tab 2 starts a new Track of the same Task. Pressing Return on an existing Track starts a new instance of the same Track. Using the same description.